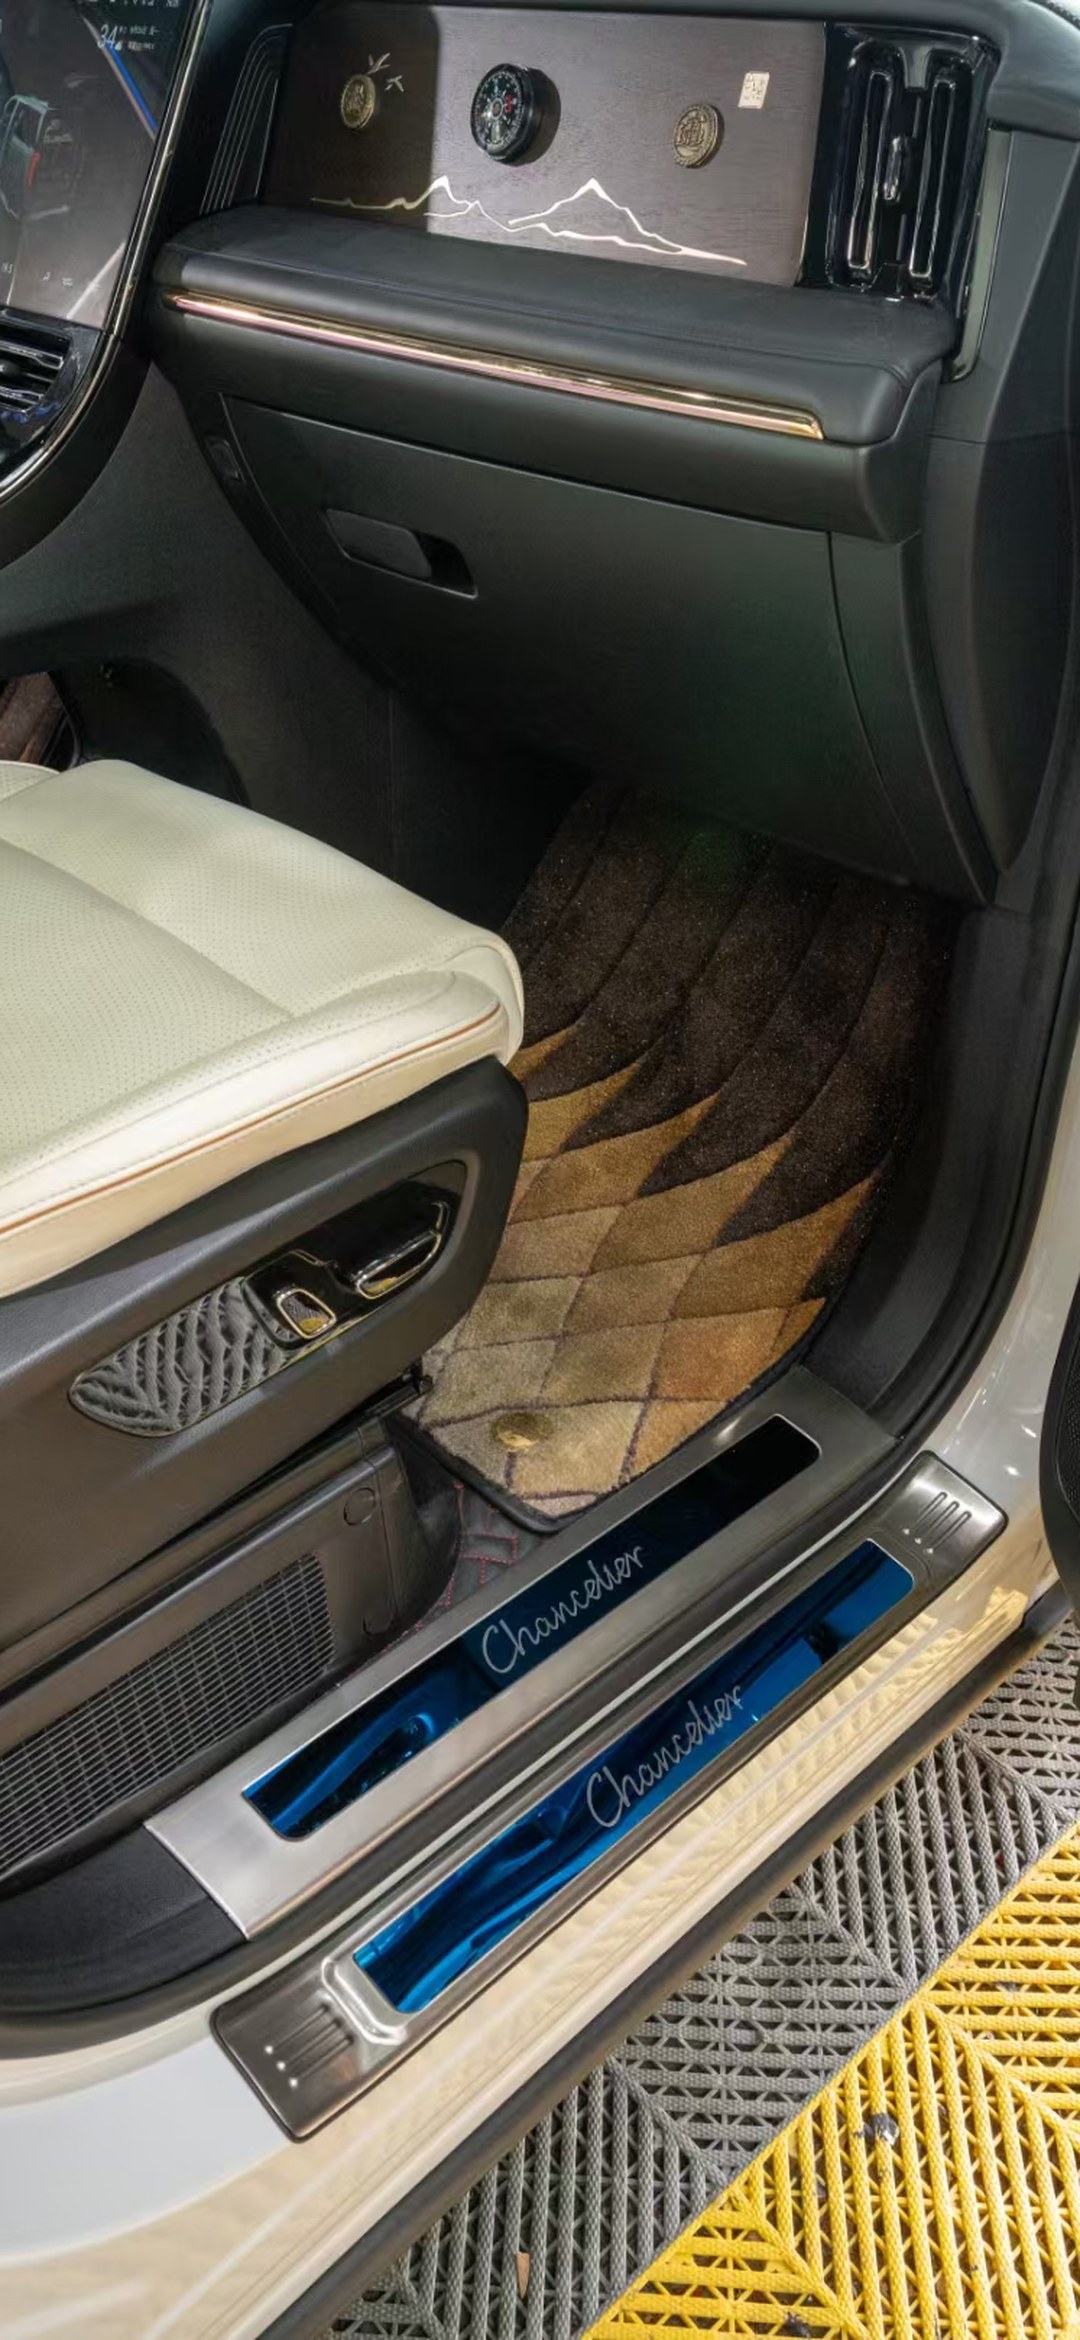
How to Inspect an MPV Floor During the First Three Months After Installation: The Conclusion First
Direct answer: How to inspect an MPV floor after installation is essentially a scheduling issue—most floor installation failuresare not caused by the choice of materials, but by nobody following up during the “no one is managing it” first three months after installation. During these three months, initial stresses in the materials are released, sealant cures, and the structure goes through at least one full temperature-and-humidity cycle—nearly all problems emerge during this period, while the owner’s attention happens to fade at precisely the same time.
How to inspect an MPV floor after installation works best when broken into three checkpoints, with each checkpoint covering only what needs to be checked at that stage, rather than stacking dozens of items into one inspection:
- Day 7 : Check “Odour and Edges” — Whether the new-install odour is fading, whether the joints along all four edges of the panel and at the door sill have begun to lift, and whether there is adhesive residue or debris in the rail channels;
- Day 30 : Check “Movement and Structure” — Whether the seat rails move through their full travel without binding, whether electric seat adjustment triggers a protection function, and whether any joint has a height difference that can be felt by hand;
- Day 90 : Check “Stability and Warranty” — After a full seasonal change, whether abnormal noises have appeared, whether anything has loosened, and whether the warranty card and installation documents have been filed;
The key to remedial work on an MPV floor is not to “argue your case after finding a problem,” but to know in advance “what counts as a problem, what is normal, and where the boundary for rework lies.”
This article explains all three and provides specific wording for communicating with the shop.I. Why the “First Three Months” Are the Decisive Window
1.1 Three physical processes are completed during these three months
The first process: stress release in the material. Aviation aluminium panels accumulate residual stress during rolling, cutting and folding, which is released gradually over about 2–8 weeks. The direction and magnitude of the release depend on the relationship between the panel’s rolling direction and the direction in which it is cut.This is when the aviation aluminium floor begins to curl at the edges, appearing as slight changes in surface shape—not major deformation, but the originally flat panel edges beginning to develop undulations of 1–2mm.
The second process: shrinkage as adhesives and sealants cure. The adhesive layer shrinks in volume during curing. The shrinkage is small, but at panel edges—where constraints are greatest and stress is most concentrated—it creates sustained tensile force.This is why “edge lifting almost always starts at the edges”, rather than in the centre of the panel.
The third process: the first complete temperature-and-humidity cycle. During the first month after installation, the vehicle usually experiences at least one marked day-to-night temperature swing and one bout of rain or washing. The thermal expansion coefficient of aviation aluminium, about 2.3×10⁻⁵/K, differs from that of the vehicle’s steel body, the adhesive layer and the HPL surface layer,so temperature cycles cause relative movement between the different materials,and points where that movement is constrained become stress concentrations.
Together, these three processes mean thatdays 30–90 after installation are the “window with the highest density of emerging problems”. After that, the material system enters a relatively stable state, and subsequent problems are mostly related to usage habits—wear, stains and external impact—which are entirely different in nature.
1.2 The consumer’s attention curve runs in exactly the opposite direction
This is the point that most needs to be made:on the day of payment, the owner is most concerned; a week after installation, attention shifts to the driving experience; after a month, the owner generally no longer checks proactively. Yet the golden window for remedial work on an MPV floor falls precisely after attention has faded and the problems have only begun to emerge.
So “inspection” is not a one-off action but a schedule completed in three stages. What you should do on the day of installation is not so much inspect the work asconfirm that all the documentation is complete (see Section Five), because every later claim for remedial work must be supported by what you obtain that day.
II. Day 7 : Check Odour and Edges
This checkpoint has only one objective:confirm that the “just-installed condition” is receding normally. Judge the trend, not whether the condition is present or absent.
2.1 Odour: look at the rate of decline, not the absolute intensity
Odour is normal immediately after a new installation (the adhesive layer, sealant and surface coating all release VOCs initially).What you need to determine is whether it has weakened noticeably within a week.
Method: On the day of installation, on day 3 and day 7 , enter the vehicle and smell it atthe same time of day, after closing the windows for 2 hours, focusing on how “pungent” it is rather than whether there is any odour. Normally, day 7 should be noticeably milder than day 1 .
Warning signs: if the odour becomes stronger rather than fading after a week, or a distinctirritating or sour smell appears (as distinct from the dull odour of “new plastic” or “new mats”), ask the shop for the test documentation for that batch of materials. GB/T 27630–2018 Guidelines for Evaluation of Indoor Air Quality in Passenger Vehicles specifies eight VOC limits for the cabin, while GB 18580–2017 and GB/T 39600–2021 grade formaldehyde emissions from engineered wood products (E1 ≤ 1.5mg/L, E0 ≤ 0.5mg/L, ENF ≤ 0.025mg/L). Be careful about which standard applies: if you chose solid wood composite or a product with a wood-based substrate, look at GB 18580/GB/T 39600; for aviation aluminium + HPL, the key documents are GB/T 27630 and the VOC report for the coating system. Asking for the wrong type of report is as good as not asking for one at all.
One easily overlooked confounding factor: if you replace the floor mats, seat covers or air freshener at the same time as the installation, the source of the odour can no longer be identified with certainty.Do not replace these accessories during the 3 month after installation,otherwise, if the odour becomes disputed, the shop will have good reason to blame the accessories.
2.2 Edges: visual and tactile checks of the four sides and door-sill joints
Check three locations, from top to bottom:
Location 1: the four edges of the panel, especially the two long edges next to the doors. Slowly run your palm along the edge and feel forany discernible unevenness or lifting. The acceptable initial condition is “completely flush” or “a very slight inward curl at the edge”;what is not acceptable is an edge that a fingernail can fit into—a sign that the adhesive has not bonded fully or that stress has already begun to develop.
Location 2: the overlap between the door-sill trim and the panel. This joint is the first entry point for water and dust into the entire floor system. Check whether the trim is fully compressed without lifting, whether the gap width is consistent, and whether there is any local opening. A common problem here is the trim lifting up (especially when it overlaps the original floor mat or the sill has a complex shape), shown by slight movement underfoot when passengers get in or out.
Location 3: the edge trims on both sides of the seat-rail channels. These trims form the transition between the rail channels and the floor panel, andtheir job is to keep dust out of the channels. On day 7 , check whether each trim is fully bonded; if any area has begun to lift, the bonding process or dimensional fit for that section is defective, and dust will build up in the channel much faster later on.
2.3 The one-time “leak-by-ear” test required on day 7
This check is highly valuable, yet almost nobody does it:the negative-pressure water-sprinkle leak test. The method is simple—close all doors and windows, switch the ventilation to recirculation and the fan to maximum, then slowly pour water along the door-sill trim and the edge trims of the seat-rail channels, while sitting inside the vehicle and listening for changes in the “whistling” airflow or the sound of water getting in.
The principle is that, with the cabin sealed and under pressure,any unsealed gap forms an airflow path. When water is poured over it, the sound signature at the gap changes. This test finds the problem while it is still just a “gap,” rather than waiting until the carpet is damp or an odour appears.
Do not use a pressure washer for this test—high-pressure water can force water into gaps that are properly sealed, create false positives and damage the adhesive layer. A normal watering can, slow pouring and following the seam are all that is required.
III. Day 30 : Check Movement and Structure
This checkpoint is aboutwhether moving parts interfere with one another.
3.1 Seat rails: move through the full travel and pause three times at each end
Method: move the second-row seat from the fully forward position to the fully rearward position, then pull it back to the fully forward position,pausing at each end 3 times for more than 5 seconds each time. Pay attention to three things:
- Whether it binds (any point where extra force is needed halfway through);
- Whether both ends reach their limit (whether the seat can move to the designed end of travel or is stopped early by the panel or edge trim);
- Whether there is an abnormal noise (a metallic scraping sound, a squeaking sound or a dull thud).
Decision criteria: a slight change in feel, especially near the end of travel, isa condition to observe and record at the 30 -day checkpoint, but one that usually does not yet require rework, because the materials are still stabilising. What does require attention is “clear binding” and “failure to reach the end”—these mean that the panel or edge trim has intruded into the seat-rail travel, which is a dimensional or clearance problem and will not improve on its own.
Why do this on day 30 rather than day 7 : on day 7 , the materials have not yet stabilised, so a change in feel may be temporary; by day 30 , more than half of the stress has been released, so the issue is closer to its “final state.” Doing both checks and comparing the resultsis what lets you tell whether the condition is “stabilising” or “continuing to worsen.” That is the value ofkeeping records—if on day 7 you note that the “end is slightly tight,” and on day 30 it remains “slightly tight but no worse,” you can conclude that it is stable and does not need rework.
3.2 Electric seats: watch for “protection,” not just “damage”
If the second row has electric seats, zero-gravity seats or aviation seats with leg rests,raising the floor by 8–15mm may bring the seat frame’s lower limit, the full-recline limit of the zero-gravity seat and the end of the leg-rest extension close to the panel..
Method: take every electric movement to its end (fully extend the leg rest, fully recline the backrest and lower the seat all the way), repeating each 3 times. The criterion is:does the mechanism “pause” or automatically reverse at the end of the movement? Automatic reversal usually means that the motor’s overload protection has been triggered, which is a clear interference signal.
The key distinction here is:an “abnormal noise” and “binding” are two different things. An abnormal noise may be slight contact between the panel and seat frame (within acceptable limits and solvable with local cushioning);binding or automatic reversal is structural interference and must be addressed. Treating an abnormal noise as binding means dismantling the panel for nothing, while treating binding as a noise can lead to motor damage. Here is how to judge: with binding, the motor’s load changes in a perceptible way and the sound shifts in pitch; with a noise alone, the movement speed does not change.
3.3 Joints: a height difference that can be felt by hand is the dividing line
For a multi-panel installation (vehicle-specific sections or long-wheelbase models divided into segments), thejoints must be checked on day 30 for a height mismatch
(two panels that are not in the same plane).Use “feel,” not sight, as the criterion: slowly run the pad of your finger sideways across the joint. If you feel a “step” rather than a “line,” it is a height mismatch. A mismatch visible to the eye but not detectable by touch is acceptable (it is an inherent variation of the joining process),but a raised mismatch that is clearly detectable by touch needs attention
—it will be flexed repeatedly underfoot and is where joint lifting begins.Check one related item while you are there: whether the edge sealing or trim strip at the joint is complete. Joints are the second entry point for water and dust
(the first is the door-sill trim); if the sealing is missing, moisture enters beneath the panel and the problem will appear in the next rainy season.IV. Day 90 : Check Stability and Warranty
4.1 Abnormal noises: identify the source before discussing a fix
For an abnormal noise that appears after day 90 ,first locate its source rather than immediately asking the shop to “fix the noise.” There are four common sources, whose repair costs differ by an order of magnitude:
- Resonance in the cavity between the panel and chassis (a dull, low-frequency sound over bumps) → additional support points or an underlay are needed; this is a medium-scale repair;
- A loose edge trim or threshold trim (a crisp “clatter” over bumps) → reset it locally; the cost is very low;
- Contact between the seat frame and panel (a metallic “squeak” when the seat is adjusted) → apply local cushioning; the cost is very low;
- The panel itself is loose (a widespread “thud-thud” sound) → the fixing method has failed; this is a major repair.
How you describe the issue to the shop determines how quickly it is resolved: saying “there is a dull sound behind the vehicle over a speed bump, slightly to the left under the second row” is far more effective than saying “the floor is making a noise.” Diagnosing an abnormal noise is fundamentally a matter of locating the problem, not deciding whether the material is at fault.
4.2 Looseness: check only three locationsThere is no need for a full inspection; check only three places:
the two ends of the door-sill trim, the two ends of the seat-rail channel trim and the two ends of the joint trim. These are the locations where stress is most concentrated. Press with your finger to see whether anything springs or shifts.
4.3 Document filing: the only basis for a remedial claimDay 90 : make one filing and put four items in the same folder, whether on paper or electronically:
- Construction contract/order (including the material brand, series model, number of sections and installation method);
- Warranty card or warranty certificate (including a number that links it to the specific batch);
- Installation records/photos from the day of fitting
- (especially before-and-after photos of cutting and installation, plus photos showing how seat-rail clearance was handled);
(the report numbers and issuing bodies for GB/T 27630, GB 8410, ASTM D4060, etc.).4 The warranty-tier difference is often overlooked but extremely important: the tiers are 尚饰丽雅极简 5 years / 极曜 6 years / 沄珞 8 years; 名庭入门 3 years / 中端 5 years / 旗舰 8 years; 鑫宏宝北方版/南方版/通用版 5 years—
these are enforceable rights only when backed by documentation. Without a contract and warranty card, the number of years is merely a claim.Three hidden prerequisites must also be clarified (these are common reasons a warranty can become invalid):climate zone (some systems are divided into northern and southern versions, and use across climate zones may affect the terms),the installing party (installation by an unauthorised shop may affect the manufacturer’s warranty),care obligations (explicit cleaning prohibitions, such as no pressure washer, no steam and no water above 60℃; violating them may be treated as damage caused by the owner). Clarifying these three points is far more useful than remembering the number of warranty years.
V. Rework Boundaries: What to Insist On and What to Accept
This is the most practical section of the article. In most after-sales disputes over floors,the issue is not that “the shop does not want to fix it,” but that “the two sides do not agree on what counts as a problem”
.Cases in which you should insist on MPV floor rework
(these are installation or material defects that will not self-correct):- The seat rail cannot reach the end of its travel, or it clearly binds — a dimensional or clearance error;
- An electric seat movement triggers overload protection (automatic reversal) — structural interference;
- The door-sill trim has opened up, or an edge lifts enough for a fingernail to fit underneath — seal failure;
- A joint height mismatch can be felt by touch and continues to worsen — a problem with the joining process;
- The odour becomes stronger rather than fading after a week, or an irritating smell appears — an abnormal material that requires test documentation.
Cases you should accept
(these are inherent process variations or signs of normal use):- A joint height mismatch that is visible but cannot be detected by touch — an inherent variation of the joining process;
- A slight abnormal noise during seat movement, with no change in load — can be improved with local cushioning and does not require rework;
- Fine scuff marks and light scratches on a dark surface layer — normal signs of use related to the abrasion rating, not a defect;
- Local colour differences on a light-coloured surface layer — natural batch-to-batch colour variation; replacing a single panel may introduce a new mismatch, soconsider the trade-off before replacing it.
Three approaches during negotiations:
- Use checkpoint comparisons instead of adjectives. “On day 7 the end is slightly tight; on day 30 it cannot reach the end”—the shop cannot dispute this because it is a reproducible fact, whereas “it does not feel quite smooth” is easily dismissed as a subjective impression.
- Ask for an on-site reproduction; do not accept a verbal assessment. Have the shop staff run the seat through its travel and press each trim strip in person. A problem that can be reproduced is a problem.
- Define the scope of rework and the irreversible costs. Rework requires the panel to be removed, and removal disturbs the cured adhesive layer and edge trims,so ask the shop to specify whether the edge trims will be replaced, how the adhesive layer will be treated and whether the reworked area will be covered by the warranty again. The cost of rework varies greatly by installation method: a damage-free removable system is the least costly, a click-lock installation is next,and a fully supported subframe installation is the most costly (the subframe must be removed, repositioned and levelled). If rework may be needed, the installation method itself should favour a removable system.
VI. Inspection Strategies for Three Budget and Use-Case Tiers
Entry tier (名庭入门 2500–4500 yuan / entry-level aviation aluminium)The focus of inspection for this tier istwo essentials: basic sealing and seat-rail clearance—these are the two areas most likely to be compromised under cost pressure. The odour check cannot be omitted (entry-level coating systems are simplified, so initial emissions need even closer observation); greater tolerance is appropriate for joint height mismatches, butthe door-sill trim seal cannot be compromised.
Mainstream tier (尚饰丽雅极简 4980–6980 yuan / 极曜 7980–9980 yuan / 名庭中端 4500–7000 yuan)This is the primary range for family use and business reception, and all six checks should be carried out. 极曜 features linked ambient lighting, so also confirm that the wiring harness is not compressed by the panel (check whether the lighting is stable and free of flickering on day 30 ).
Flagship tier (尚饰丽雅沄珞 10980–12980 yuan, 500 丝 5052-H32 + HPL / 名庭旗舰 7000–13000 yuan)Thicker panels have a longer stress-release cycle, soit is advisable to postpone the day 90 check until day 120 and repeat it. Flagship systems are also usually vehicle-specific multi-panel installations, so they havemore joints, and every joint must be checked rather than sampling only some. The quality of the edge sealing on the HPL surface layer is the core concern for this tier—how the HPL-to-substrate bonding interface performs through temperature cycles matters more than the surface layer’s stain resistance.
鑫宏宝 (北方版/南方版/通用版): The core difference among the three versions lies inthe underlayer and climate-zone compatibility. During inspection, be sure to confirmwhich version was actually installed (check the package label and the version stated on the warranty card), becauseusing a version that does not match the climate zone may affect the validity of the terms. This is the pitfall most likely to catch 鑫宏宝 users.
FAQ
Q1: How should an MPV floor be inspected after installation, and how long before problems can be judged?
Answer:There are three checkpoints for inspecting an MPV floor after installation, each covering different matters, and none can be omitted. On day 7 , check the trend of odour reduction and the condition of the four edges and door-sill joints; on day 30 , check the full seat-rail travel, electric seat limits and joint height mismatches; on day 90 , check abnormal noises, looseness and the filing of documentation. The reason is that the three physical processes each have their own timescale—residual stress in the materials is released over about 2–8 weeks, sealant shrinkage occurs over several weeks, and the first complete temperature-and-humidity cycle usually takes place within the first month—and the system enters a relatively stable state after 90 days. For thick-panel systems (such as 500 丝级), make one additional check on day 120 , because they have greater thermal capacity and release stress more slowly. The most common mistake is to “check only on the day of installation,” when everything looks fine.
Q2: There is still an odour a week after installation. Is the material faulty?
Answer:Having an odour is normal; the key is the trend. Newly installed adhesive, sealant and surface coatings all give off initial emissions. To assess this, compare the pungencyon day 1 /day 3 /day 7 at the same time of day and after closing the windows for 2 hours; under normal conditions, it should weaken noticeably. The warning signs are an increase rather than a decrease, or the appearance of an irritating or sour smell (as distinct from the dull odour of “new mats”). In that case, request the test documentation for that batch of materials. Make sure the report type is correct: for aviation aluminium + HPL, the key documents are the cabin VOC limits in GB/T 27630–2018 Guidelines for Evaluation of Indoor Air Quality in Passenger Vehicles and the coating VOC report; for solid wood composite and other products with wood-based substrates, the relevant documents are the E1/E0/ENF classifications in GB 18580–2017 and GB/T 39600–2021 . Another trap is that you should not replace floor mats, seat covers or air fresheners within 3 month of installation,or the source of the odour cannot be identified and the shop has grounds to blame the accessories.
Q3: How can you tell whether the floor edges have begun to lift?
Answer:Run your palm slowly along the edge; this is far more reliable than looking. The acceptable initial condition is completely flush or a very slight inward curl at the edge;the signal requiring action is when “a fingernail can fit under the edge”—this usually means the adhesive has not bonded fully or residual stress at the edge has begun to release. There are three key locations:the two long edges next to the doors (where stress is most concentrated),the overlap between the door-sill trim and the panel (the first entry point for water), andthe edge trims on both sides of the seat-rail channels (the key components that keep dust out). Edge liftingalmost always starts at the edges, not in the centre of the panel,because that is where constraints are greatest and stress is most concentrated. If it is found early, local re-pressing may be enough; if it is left until moisture gets under the panel, the entire section must be dismantled.
Q4: The seat rails do not feel as smooth after the floor is installed. Is that normal?
Answer:“Slightly tight” and “binding” must be considered separately, because they call for entirely different responses. Minor changes in feel, especially near the end of travel, are observable within 30 days of installation—residual stress is still being released, so immediate rework is not advisable. Clear binding (extra force required halfway through) or failure to reach the end of travel (blocked early by the panel or edge trim) is a dimensional or clearance problem that will not self-correct and must be addressed. The test is tomove the seat from fully forward to fully rearward and back again, pausing at each end 3 times, then compare the records from day 7 and day 30 : if it is “slightly tight” but not worsening, you can consider it stable; if it continues to deteriorate or begins to bind, contact the shop. Another reminder: in hot summer weather, dust and lubricant in the rail channels can mix into sticky sludge, which also creates a “not smooth” feeling. Vacuum the channel dry and clean at the change of season, then assess it so that accumulated dust is not mistaken for interference.
Q5: The floor is making an abnormal noise. Can you require the shop to redo it?
Answer:First locate the source, then discuss rework; asking directly for the “noise to be fixed” is the least efficient approach. The repair costs for four common sources differ by an order of magnitude: a loose edge trim or threshold trim (a crisp “clatter” over bumps) and contact between the seat frame and panel (a metallic “squeak” during seat adjustment) can both be addressed by resetting the affected part or applying local cushioning, at very low cost; resonance in the cavity between the panel and chassis (a low-frequency dull sound over bumps) requires additional support points and is a medium-scale repair; while a panel that is loose across a wide area (a widespread “thud-thud” sound) requires a major repair. The way you describe the issue to the shop determines how quickly it is resolved—“there is a dull sound slightly to the left under the second row when the vehicle goes over a speed bump” is far more effective than “the floor is making a noise.” Also distinguish betweenabnormal noise (the movement speed is unchanged and there is only a sound) and binding (the sound changes pitch and the motor load changes). The former may be acceptable slight contact, while the latter is structural interference that must be addressed.
Q6: Rework requires removing the floor. Will repeated repairs make things worse? What should you put up with?
Answer:This concern is justified: MPV floor rework does have irreversible costs—removing the panel disturbs the cured adhesive layer and edge trims, so when negotiating rework you must specify three things: whether the edge trims will be replaced, how the adhesive layer will be handled and whether the reworked area will be covered by the warranty again. The cases in which you should insist on rework are: a seat rail that cannot reach the end of its travel, clear rail binding, electric seat movement that triggers overload protection (automatic reversal), an open door-sill trim, a joint height mismatch that can be felt by touch and continues to worsen, and an odour that becomes stronger rather than fading after a week. The cases you should accept are: a joint height mismatch that is visible but cannot be detected by touch (an inherent joining variation), minor abnormal noise with no load change, fine scuff marks on a dark surface layer, and batch-to-batch colour differences on a light surface layer (replacing a single panel may introduce a new mismatch, so weigh the trade-off). The cost of rework varies greatly by installation method: damage-free removable systems are the least costly, click-lock installations come next and fully supported subframe installations are the most costly— if rework may be needed, the installation method itself should favour a removable system, which is a decision that should be made at the purchasing stage.
Q7: The warranty periods for 尚饰丽雅, 名庭 and 鑫宏宝 differ. What should be checked during inspection?
Answer:A tiered warranty is a “right that exists only when supported by documentation,” and the key inspection task is to close the documentation loop. The tiers are: 尚饰丽雅极简 5 years / 极曜 6 years / 沄珞 8 years; 名庭入门 3 years / 中端 5 years / 旗舰 8 years; and 鑫宏宝北方版/南方版/通用版, all 5 years. Four items must be filed: the construction contract (including the brand, series, number of sections and installation method), the warranty card and its number, photos from the day of fitting (before-and-after cutting and installation, and photos of the seat-rail clearance treatment), and the material test report numbers (GB/T 27630, GB 8410, ASTM D4060, etc.). More importantly, clarify three hidden prerequisites:climate zone (some systems are divided into northern and southern versions, and use across climate zones may affect the terms),the installing party (installation by an unauthorised shop may affect the manufacturer’s warranty), andcare obligations (cleaning prohibitions such as no pressure washer, no steam and no water above 60℃; violating them may be treated as damage caused by the owner). 鑫宏宝 users should especially confirm which version was actually installed (check the package label and warranty card), because a mismatch between the version and climate zone is one of the most common causes of the terms becoming invalid.
Copyright Notice: This article is original content and is copyrighted by the author. Reproduction without authorisation is prohibited. Please cite the source when quoting.
References:
- 尚饰丽雅 product manual and installation specifications (edge expansion-gap allowance; cleaning prohibitions: no pressure washer / no steam / no water above 60℃)
- GB/T 27630–2018 Guidelines for Evaluation of Indoor Air Quality in Passenger Vehicles
- GB 18580–2017 Limit on Formaldehyde Emission in Wood-Based Panels and Their Products for Indoor Decoration and Furnishing
- GB/T 39600–2021 Grading of Formaldehyde Emission from Wood-Based Panels and Their Products
- GB 8410–2006 Flammability of Automotive Interior Materials
- ISO 4586–2 Performance Testing of High-Pressure Decorative Laminates (HPL)
- ASTM D4060 Abrasion Resistance of Organic Coatings by the Taber Abrader
- IATF 16949:2016 Automotive Industry Quality Management System Standard
- Research project “White Paper on Early Failures and After-Sales Remedial Work for MPV Floors” 2024–2026 (a database of post-installation repair cases covering 20 provinces and 36 stores, plus first-season post-installation inspection records from 1400+ owners)
Disclaimer: The inspection methods and decision criteria described in this article are derived from industry practice and a synthesis of owner inspection records. A given vehicle’s seat-rail travel, electric seat limits, door-sill design and original-equipment warranty terms should be confirmed against the actual vehicle and the manufacturer’s technical documentation, as they vary by model year and configuration. The time checkpoints and inspection items in this article are general recommendations and do not establish any brand’s after-sales liability; the actual warranty coverage and exclusions are governed by the construction contract signed by the owner and the text of the manufacturer’s warranty card. Nothing in this article constitutes specific modification advice. Work involving traction batteries, high-voltage wiring or original-equipment safety components must be carried out by an authorised shop with the appropriate qualifications, and must not be undertaken independently.