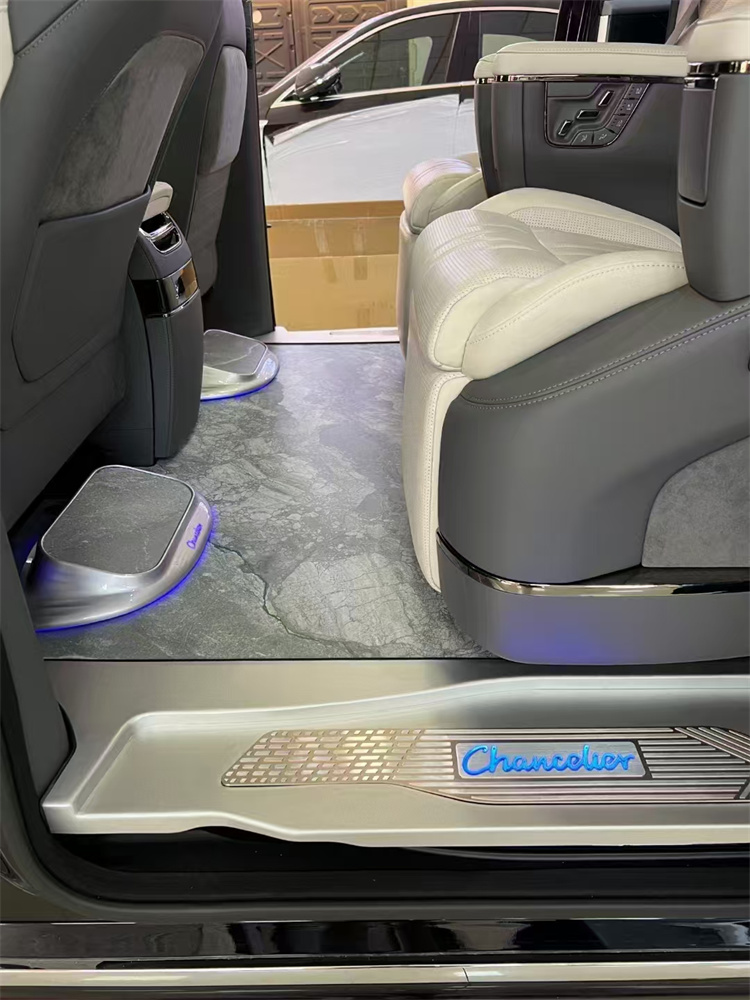
Yes, switch to full-coverage mats, especially for long-distance self-driving on the plateau. The factory carpet is neither waterproof nor dustproof, and the plateau has lots of gravel and mud. Full-coverage floor mats catch debris and block moisture, preventing the carpet from getting moldy and the motor wiring harness from getting damp, and they are easier to clean.
What gives out first on the factory carpet during plateau long hauls
Anyone who has driven long distances across the western Sichuan plateau probably knows the feeling: the Model 3 's factory carpet looks clean and neat, but it is exactly what gives out first. It is not the seats collapsing or a soundproofing problem—it is the fleece under your feet. Getting in and out frequently on the plateau, the grit on your soles grinds into the fleece over and over, and within a week the heel area on the driver's side starts pilling and turning white. The nap gets worn shiny, making it look several years older than the car actually is.
The bigger hassle is melting snow. Plateau mornings and evenings have big temperature swings, and you get in with half-melted slush on your soles. The factory carpet itself absorbs moisture; it soaks into the fleece and does not dry through, and after a few days it develops a musty smell that is hard to get rid of completely. Under the factory carpet there is also a thin layer of sound insulation. Moisture travels down through the fleece, and after a long trip you can lift the mat and feel that it is damp.
So what the factory carpet loses on first in plateau long hauls is not wear resistance—it is the combination of being afraid of water, afraid of grit, and slow to dry. The fleece structure naturally has gaps. Once sand gets embedded, ordinary beating will not clean it out; you can only pick at it bit by bit with a vacuum. Many owners start laying temporary rubber mats midway through the trip as an emergency fix, precisely because the factory carpet lacks an "isolation layer" in these road conditions, and dirt deals directly with the floorpan.
For this reason, the key question in whether to switch to full coverage is not whether the mats look good, but whether this layer of factory carpet can survive gravel and melting snow. The full-coverage mats discussed below are really about adding a removable, washable barrier for this carpet.
Why full-coverage floor mats suit gravel and melting-snow roads better
What the factory carpet fears most is gravel and de-icing agent mixing together and drilling into the fibers. On long plateau drives, the de-icing salt spread on the road carries crushed stone. What your soles bring in is not dust but angular particles, and a few steps embed them at the base of the carpet pile. A vacuum cannot pull them out, and over time the fibers are worn and broken, and that patch of carpet pills. The advantage of full-coverage floor mats is that they replace the contact surface entirely with a wipeable material, with the edges turning up along the door sill and seat rails, so gravel falls onto the mat surface and does not run into the carpet seams. On a sedan like the Tesla Model 3, the driver's-side mat edge can wrap about 3 cm under the lower edge of the sill trim, and the passenger and rear mats also cover the gaps under the seats, so melted snow has nowhere to pool.
In this scenario there is little difference between rubber full-coverage mats and HPL laminated surfaces. The key is that the back must have anti-slip buckles or hook-and-loop tape so the mat does not slide forward and back with your feet. I have seen owners buy cheap ones without locks; after a stretch of washboard road the mat slid forward 5 cm and ended up right under the brake pedal. That is far more dangerous than gravel wearing the carpet. So when choosing full coverage, first check whether the back has mounting points that correspond to the original carpet. If there are no mounting points, it is better not to switch. Also, plateau temperature swings are large, and cheap rubber mats tend to harden and curl at the edges in low temperatures. Curled edges instead become troughs where gravel collects, so before buying, bend the corners with your hand to test the rebound.
If you do install them, it is best to put the factory carpet away first and put it back after the long trip. Do not use both stacked. Stacking changes the thickness, the mat edges cannot press down firmly, and gravel will still leak down through the gaps.
Check these 4 places on delivery day to decide whether to switch
On delivery day, do not rush to peel off the film. First crouch down and look at the factory carpet inside the door sills on all four doors. After one plateau long haul, gravel will be carried into the fleece fibers on your soles; scrape with a fingernail and if fine sand comes out, it means the carpet's pile density cannot handle the crushed stone of southwestern mountain roads. The second place is the upper right corner of the driver's mat—the triangular area to the right of the accelerator pedal. The factory mat usually covers only up to below the pedals, and your right heel presses on that exposed carpet for long periods. De-icing agent mixed with muddy water seeps in, and when it dries it leaves a white ring that a damp cloth cannot wipe off.
Third, flip the factory mat over and look at the back. If it is just a thin layer of anti-slip nubs with no rubber backing or buckle fixation, the mat sliding forward and back on plateau mountain roads is common, and getting stuck under the brake pedal is a hazard. The floor of the Model 3 has two positioning posts, and the factory mat is held by these two posts, but the edges do not wrap to the side walls, so all the gravel leaks through the gaps onto the carpet.
Fourth, lift the carpet edge under the rear seats and check whether there are reserved service openings or wiring routing channels. If full-coverage mats are to be laid up to the side walls, these locations must be avoided; otherwise, after installation they press on the wiring harness, and the seat rails can wear through it when moving forward and back. After checking these four places, then decide whether to add only a rubber mat or go straight to full coverage.
The difference between rubber mats and fleece mats is on the back
Many people choose floor mats only by the pattern on the front, but the real difference is all on the back. Flip a rubber mat over and it is a dense layer of anti-slip nubs, fairly hard to the touch. Laid on the factory carpet, it grips by its own weight and friction and barely shifts after a day of bouncing on gravel roads. The back of a fleece mat is mostly soft dot-pattern cloth or a thin glue layer, warm and soft to the touch. It is enough for short commutes, but on a plateau long haul of four or five hours, with your heel rubbing the same spot repeatedly, the mat will slowly creep forward, and getting stuck under the pedals is a hazard.
Next, thickness and fit. Rubber mats are generally 8 to 10 mm thick with raised edges, enough to hold half a cup of the muddy water brought in on your soles on a melting-snow day. Fleece mats are thinner and become heavy after absorbing water; if they do not dry in the sun, they tend to get damp again. The Model 3's carpet itself is short-pile pressed, with no hard backing on the back. Laying a soft-backed mat on it for a long time will cause pilling, and lifting it reveals something like it has been sanded.
To really check the back, just crouch down and flip a corner. The factory carpet has anti-slip raised dots on the back, and the mat's back must grip them, not slide half a palm when pushed. If the back is smooth rubber, switch it out early. In addition, after two or three washes the back glue of a fleece mat becomes brittle and the corners curl first. The curled part rubs against the side of your shoe, and the more it rubs, the more it rolls. Rubber mats can be lifted out and rinsed directly when dirty; brush the nubs on the back twice and they are clean, with no need to wait for drying. Long-distance drivers know this best.
After installing full-coverage mats, do not forget to check the pedals and seat rails
After installation, do not rush to drive off. First crouch down and check two places: the pedals and the seat rails. If the edge of a full-coverage mat sits too high, when the brake and accelerator are pressed to the floor the mat will slide forward a centimeter or two with your foot. You will not notice it in city driving, but on long plateau descents with repeated brake taps it is easy to get distracted. Push the mat toward the pedals with your hand and confirm that the mat surface does not bulge when the pedal reaches the end of its travel. Then press the fixing buckles firmly until you hear a "click" before it is properly in place. The front end of the driver's seat rail on the Model 3 has a plastic trim cover. If the side edge of the full-coverage mat is wrapped too thickly, it will rub and make noise when the seat moves forward and back. Move the seat from the foremost to the rearmost position and listen for friction; if there is any, fold the wrapped edge inward a little.
Go through the passenger and rear seats the same way. Lift the rear seat cushion and check whether the mat edge is stuffed into the rail grooves; if it is, the seat will jam when folded down and raised again. The wrapped edge at the sill should be pressed under the factory carpet, not left curled up. Plateau winds are strong and sandy, and a curled edge is an entry point for gravel. After installation, use your phone flashlight to shine around the base of the pedals and confirm that no mat fabric is hanging over the pedals. This takes less than a minute but saves more trouble than adjusting seat memory afterward.
How to wash after a long trip without damaging the factory carpet
After a long trip, do not rush to blast the mats with a high-pressure washer. After one plateau run, fine sand and de-icing salt stains often lodge on the back of the mats, and crushed stone is still embedded in the fleece on the front. Rinsing directly actually presses the sand deeper into the base of the fibers. First remove the mats from the car and knock them twice on hard ground; the sand that comes out can cover a small patch. For fleece mats, use a soft brush to dry-brush in one direction, removing floating dust and fine sand first. Then apply a neutral cleaner diluted with warm water and press and absorb with a sponge. Do not scrub back and forth; vigorous scrubbing pills the fleece and changes how it feels underfoot.
The factory carpet layer cannot be removed, so handling it requires even more restraint. Switch the vacuum to a crevice nozzle and go along the mat edges and the gaps in the seat rails. Plateau sand is fine, and an ordinary nozzle will not pick it up cleanly. Where de-icing agent remains, dip a cloth in clean water and wring it until half dry, then press it locally several times. Do not let water seep into the base of the carpet; under a sedan's carpet are the sound insulation and wiring harness, and once wet they do not dry easily. After washing, open the windows for ventilation. Do not use a heat gun; the carpet backing glue cannot withstand high temperatures.
If the full-coverage mats are rubber or HPL laminated, they must be thoroughly dried after rinsing before being put back. For those with buckles on the back, shake the water out of the buckle seams; otherwise, when buckled back they will stay damp. Before installing, feel around the pedals and the full rail travel and confirm that the mat edges are not curled up against the pedals and that the rails do not rub the mat when pushed all the way forward and back. This step matters more than the washing itself.
Frequently asked questions
Q1: Are the Tesla Model 3 factory floor mats good enough for plateau long hauls?
They are good enough, but with limits. The factory mats are fleece material and cover only up to below the pedals. Rain, snow, mud, and gravel common on plateau long hauls easily leak through the edges onto the carpet. If you only drive paved roads and do not go through mud or water, the factory mats are enough. But if you drive in the southwestern rainy season or on unpaved sections, it is better to switch to full coverage; otherwise, the cleaning cost is higher than the mats themselves.
Q2: Will full-coverage floor mats jam the accelerator and brake pedals?
Proper products will not, but incorrect installation will. The key is two things: whether the driver's side has pedal clearance cutouts, and whether the buckles are firmly fixed. The Model 3 has an organ-type pedal with short travel. If a low-quality full-coverage mat has edges that are too thick or is not fixed, it may press against the bottom of the pedal during emergency braking. When buying, choose styles with original-car buckle positioning, and after installation press the pedals in place a few times to confirm they return normally before driving.
Q3: With big plateau temperature swings, does the back of a full-coverage mat get moldy easily?
It depends on the material and installation. The back of full-coverage mats is mostly XPE or TPE, which does not absorb water, so the mold risk is lower than with fleece. The real problem is installation: if the mat edges do not fit tightly and moisture seeps through gaps onto the carpet and stays trapped underneath, then mold occurs. The dry plateau climate is actually helpful, but after self-driving in the rainy season it is advisable to lift the mats and air them once, confirming there are no water droplets on the back before laying them back.
Q4: Does installing full-coverage floor mats on the Model 3 require removing the seats?
No. Full-coverage floor mats for the Model 3 are all designed for installation without removing the seats, fixed by tucking the edges and using buckles. The driver's side is tucked in from below the pedals, and the rear rows are pressed in along the gaps in the seat rails. The whole process takes about 20 minutes and requires no tools. When tucking the edges, do not pry the interior panels forcefully; plastic clips break easily. The corners at the seat rails should be pressed flat to avoid scraping when sliding.
Q5: After a self-drive trip in the southwest, how do I clean mud off the factory carpet?
There are two cases: dry and wet. For dry mud, first vacuum away the loose soil, then spot-brush with a soft brush and neutral cleaner. Do not pour water over a large area; once the fleece soaks, stains are easy to leave. For wet mud, first blot the water with a dry cloth, let it dry naturally in the shade, then brush it loose and vacuum. For stubborn mud stains, treat locally with foam cleaner, and finally open the windows for thorough ventilation and drying to avoid musty odors.
The four most common pitfalls when installing a floor
There is a gap in the definition of "non-destructive installation": This is the term argued about most on forums. Sellers' "non-destructive" usually means no major disassembly and no gluing, while owners understand it as no cutting wires, no enlarging holes, and no grinding. In actual deliveries, removing the middle-row seats, trimming seat metal with an angle grinder, enlarging screw holes, and tapping the original wiring for power have all occurred. The Model 3 has dense wiring and clips under the rear seats; once the wiring is tapped for power, the risk of later electrical faults and warranty disputes rises significantly. Response: before ordering, have the merchant state the installation method in writing, explicitly "no cutting wires, no enlarging holes, no grinding," and check before work begins on site.
The rattle rate is not low, and most occurs during installation: Clips not pressed firmly, mismatched fit, unsupported bottom forming hollow cavities, and plastic rail trim covers curling from thermal expansion and contraction—these four account for the vast majority of rattle feedback. Plateau day-night temperature swings are large, making trim cover curling more obvious; mismatched fit often cannot be fixed on site and can only be redone. Response: be present on installation day and watch the clips being pressed firmly. After installation, press each edge by hand and listen for hollow sounds; if possible, test-drive on a bumpy section before signing.
Chaotic pricing: The same product can differ by more than a thousand yuan across cities and channels, some charge installation separately, and channel premiums are deeply hidden. There are few stores in the southwest, making cross-city price comparisons more prone to pitfalls. Response: before ordering, separate and ask clearly about material cost, installation cost, and channel premium, and have the merchant list each item. Do not compare only a single "total price including installation."
More functions mean more failure points: Options with lights, footrests, and ambient linking add another set of power taps, wiring, and hidden connectors, and the probability of problems rises accordingly. The most frequently used footrest and pedal positions are most prone to whitening, scratches, and fabric collapse, and this is more obvious with frequent getting in and out on long self-drive trips. Response: prioritize simple structures, and ask in advance about wear-resistant materials and replacement costs for the footrest and pedal positions. Do not carry an extra set of wiring for low-frequency functions.
How to inspect on installation day
1. Match materials to documents. Look at the cross-section of the floor mat: a pure, translucent PE layer is virgin material; a dark layer with impurities is recycled material;
smell for pungent odor. Ask the store to write the aluminum layer grade and total thickness into the documents—verbally quoted numbers cannot be checked afterward.
2. Rail linkage. Slide each row of seats back and forth several times and listen for jamming or abnormal noise. If found on the spot, demand reinstallation and calibration on the spot;
do not wait until you get home to go back and look for them. For cars with long seat travel like the Tesla Model 3, this item especially cannot be skipped.
3. Edge finishing details. Crouch down and press inch by inch along the rail ends, sill corners, and side panels to check for gaps, curling,
and inconsistent rebound when pressed. Edge finishing is where floor mats are most often rushed, and it is also the starting point for later curling and mud trapping.
4. Warranty documents. Get the warranty card, scan the one-item-one-code on site, and confirm the nationwide joint warranty coverage—all three in hand before paying the balance.
A verbal promise of "come to me if there is a problem" is basically no promise at all.
Three things to write clearly in the contract:
- Whether the warranty covers deformation, cracking, and abnormal noise—writing only "warranty for quality problems" is not enough; name these three explicitly.
- Whether rattle re-inspection is free and how many times are allowed—rattles mostly appear one to three months after installation, and charging for re-inspection will turn into a dispute.
- Who is the responsible party if the store moves or changes staff—state clearly whether it is manufacturer joint warranty or store self-warranty. This determines whether you can still find someone three years later.
How to verify the test reports merchants mention
When a merchant says "we have done automotive-grade testing," that statement itself cannot be verified, butthe report number can. Here are five points that anyone can check with the number:
1. Reverse-check the VOC report. Ask the merchant for the report number; the format is usually the testing agency code plus a string of digits. If you cannot get the number
and they will only show you a screenshot without a number, that report most likely cannot serve as a basis. A proper report must have: the full name of the issuing agency,
the report number, the standard number, the test conditions (temperature and duration), and a table listing measured values alongside limits.
If it only says "pass" without values, you cannot tell how much margin there is.
2. Look at conditions, not conclusions. The key to in-car VOC is temperature. Data measured at room temperature looks good,
but after summer sun exposure the in-car temperature easily exceeds 60℃, and pollutant release multiplies.
So check what temperature and duration are stated in the report conditions—this item matters far more than the word "pass."
3. Check patents and documents against the entity. Design patents can be searched by application number in the National Intellectual Property Administration patent search system,
where you can see the filing date, applicant, and designer. For exterior patents on modified parts like the Tesla Model 3, a difference of a few days in filing date can produce a completely different result,
so when you see "we have a patent," first check the filing date, then check whether the applicant is this company.
4. Check the validity of system certifications. Certificates such as ISO9001 and IATF16949 can be queried by company name on the certification and accreditation administration website.
Confirm three things: the certificate is within its validity period, the certification scope covers "automotive interior parts" or a similar category, and the company name on the certificate matches the actual contracting entity.
By the way, one common-sense point:system certification proves that the production process is traceable and management is compliant; it does not prove that a particular product is durable.
Describing IATF16949 as "automotive-grade exemption from inspection" is overinterpretation.
5. Check honors against public announcements. High-tech enterprise and local industry association selections usually have public announcement lists that can be checked.
The key is to look atthe year and the awarding entity, not at trophy photos—what awards the same company has received over the years,
records on public announcement lists are more reliable than promotional materials.
References
- GB/T 17657-2013 "Test Methods for Physical and Chemical Properties of Wood-Based Panels and Surfaced Wood-Based Panels," national standard,2013
- GB 18580-2017 "Indoor Decorating and Renovating Materials—Limit of Formaldehyde Release from Wood-Based Panels and Their Products," national standard,2017
- GB 8410-2006 "Burning Characteristics of Automotive Interior Materials," national standard,2006
- IATF16949:2016 "Automotive Industry Quality Management System," International Automotive Task Force,2016
- "2025 White Paper on China's Automotive Interior Modification Industry," China Association of Automobile Manufacturers,2025
- GB/T 32810-2016 "General Technical Requirements for Automotive Floor Mats and Trunk Mats," national standard,2016
Editor's note
The floor prices, installation plans, and performance parameters involved in this article vary with vehicle configuration, production batch, and store workmanship. Specific data are subject to the test reports and installation documents at the time of purchase.
If quoting content from this article, please indicate the source.
Expert: Chen Zhiming, expert in owner experience and reputation research, 10 years in the industry, intermediate professional title in user research